Tying a Tie for More Refined Men
A Guide to Elevate Your Style and Sophistication
Are you tired of wearing a tie that looks like it was thrown on as an afterthought? Do you want to take your style to the next level and project a sense of confidence and refinement? Look no further! In this comprehensive guide, we'll show you how to tie a tie like a true gentleman, with a focus on achieving a refined and polished look. Choosing a tie is more than just picking a color; it's about pairing fabrics, patterns, and knots with your outfit to create a balanced and polished look. Whether you're heading to a boardroom meeting or a black-tie event, a well-selected tie can transform your ensemble and convey sophistication. From classic knots to modern styles, we'll cover it all, ensuring every gentleman can achieve a flawless knot for a refined appearance.The Art of Knots: A Brief History
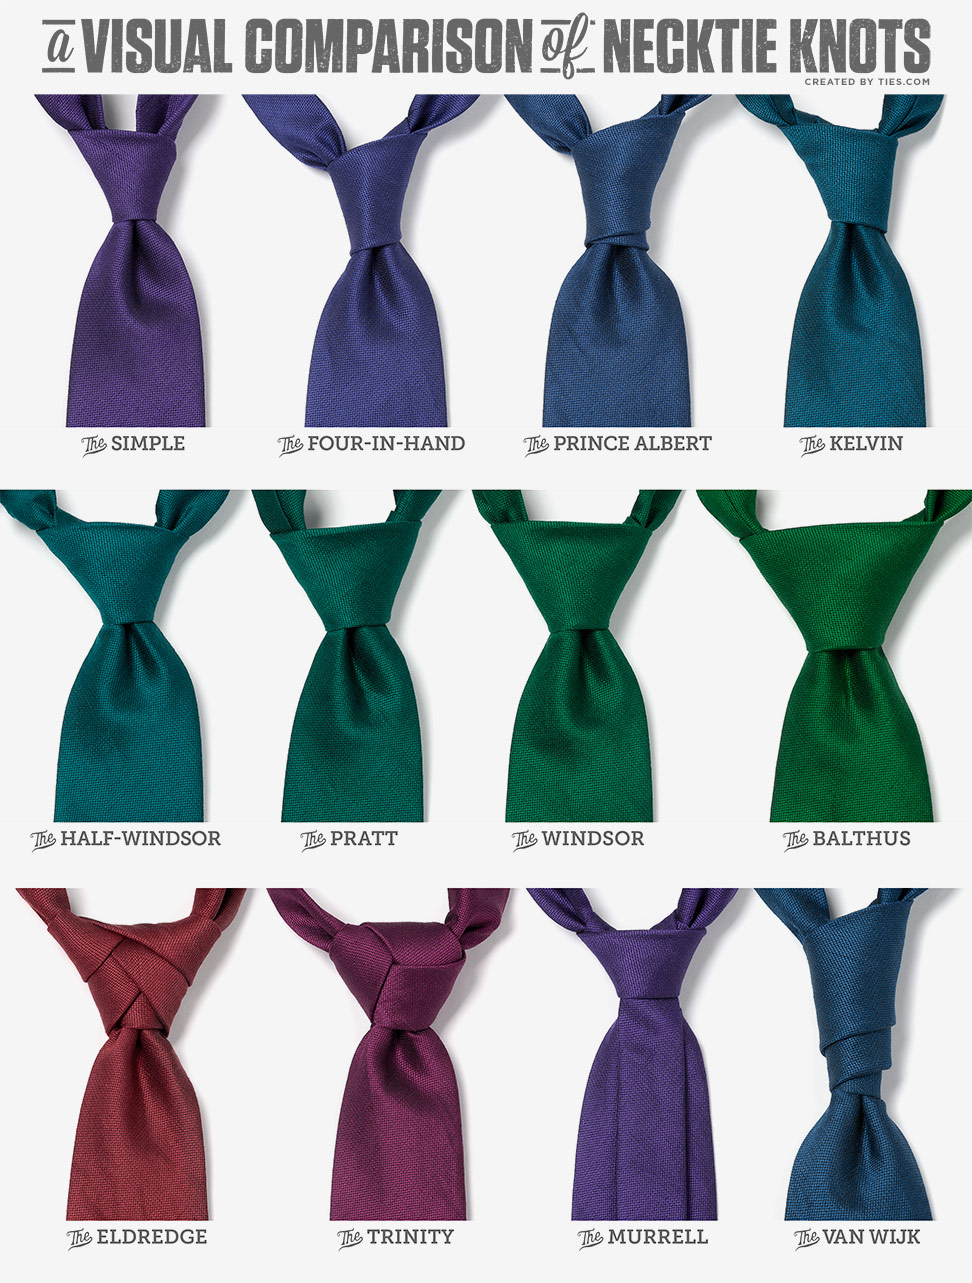
With over 55 different types of knots, each with its unique character and charm, you have an arsenal of options to express your personality. From the elegant Simple knot to the more laid-back yet refined Half Windsor, we'll explore the most popular types of knots and provide step-by-step tutorials to help you master them. Whether you're a beginner or an experienced gent, our guide will take you on a journey through the world of ties and knots.The Anatomy of a Tie
Before we dive into the art of tying a tie, let's take a closer look at the anatomy of a tie. A tie is typically made of silk or a silk and polyester blend, offering a refined finish and a memorable impression. With a wide range of patterns and materials to choose from, you can add a personal touch to your outfit and make a statement. From classic stripes to bold prints, the possibilities are endless.The Top 5 Tie Knots for Every Man
Step-by-Step Tying Guide
Mastering the art of tying a tie requires patience and practice. Here's a step-by-step guide to help you get started: 1.- Start by facing a mirror and standing up straight.
- Place the tie around your neck with the wide end on your left side and the narrow end on your right side.
- Cross the wide end over the narrow end, so that it forms an "X" shape.
- Take the wide end and pass it behind the narrow end.
- Bring the wide end up and through the loop that you just created.
- Take the wide end and pass it behind the knot again.
- Bring the wide end up and through the loop again.
- Pull the wide end gently to tighten the knot.
- Adjust the tie so it's centered and the knot is snug against your shirt.
- Finish by tucking the narrow end into your shirt and adjusting the tie to your liking.


