How to Take a Screenshot of Multiple Windows on Mac
Are you tired of taking multiple screenshots to capture a comprehensive view of your Mac? Do you struggle with figuring out how to take a seamless screenshot across your Mac and external display? Look no further! In this article, we'll show you how to take a screenshot of multiple windows on your Mac using various methods and tools.Method 1: Using the Built-in Screenshot Tool
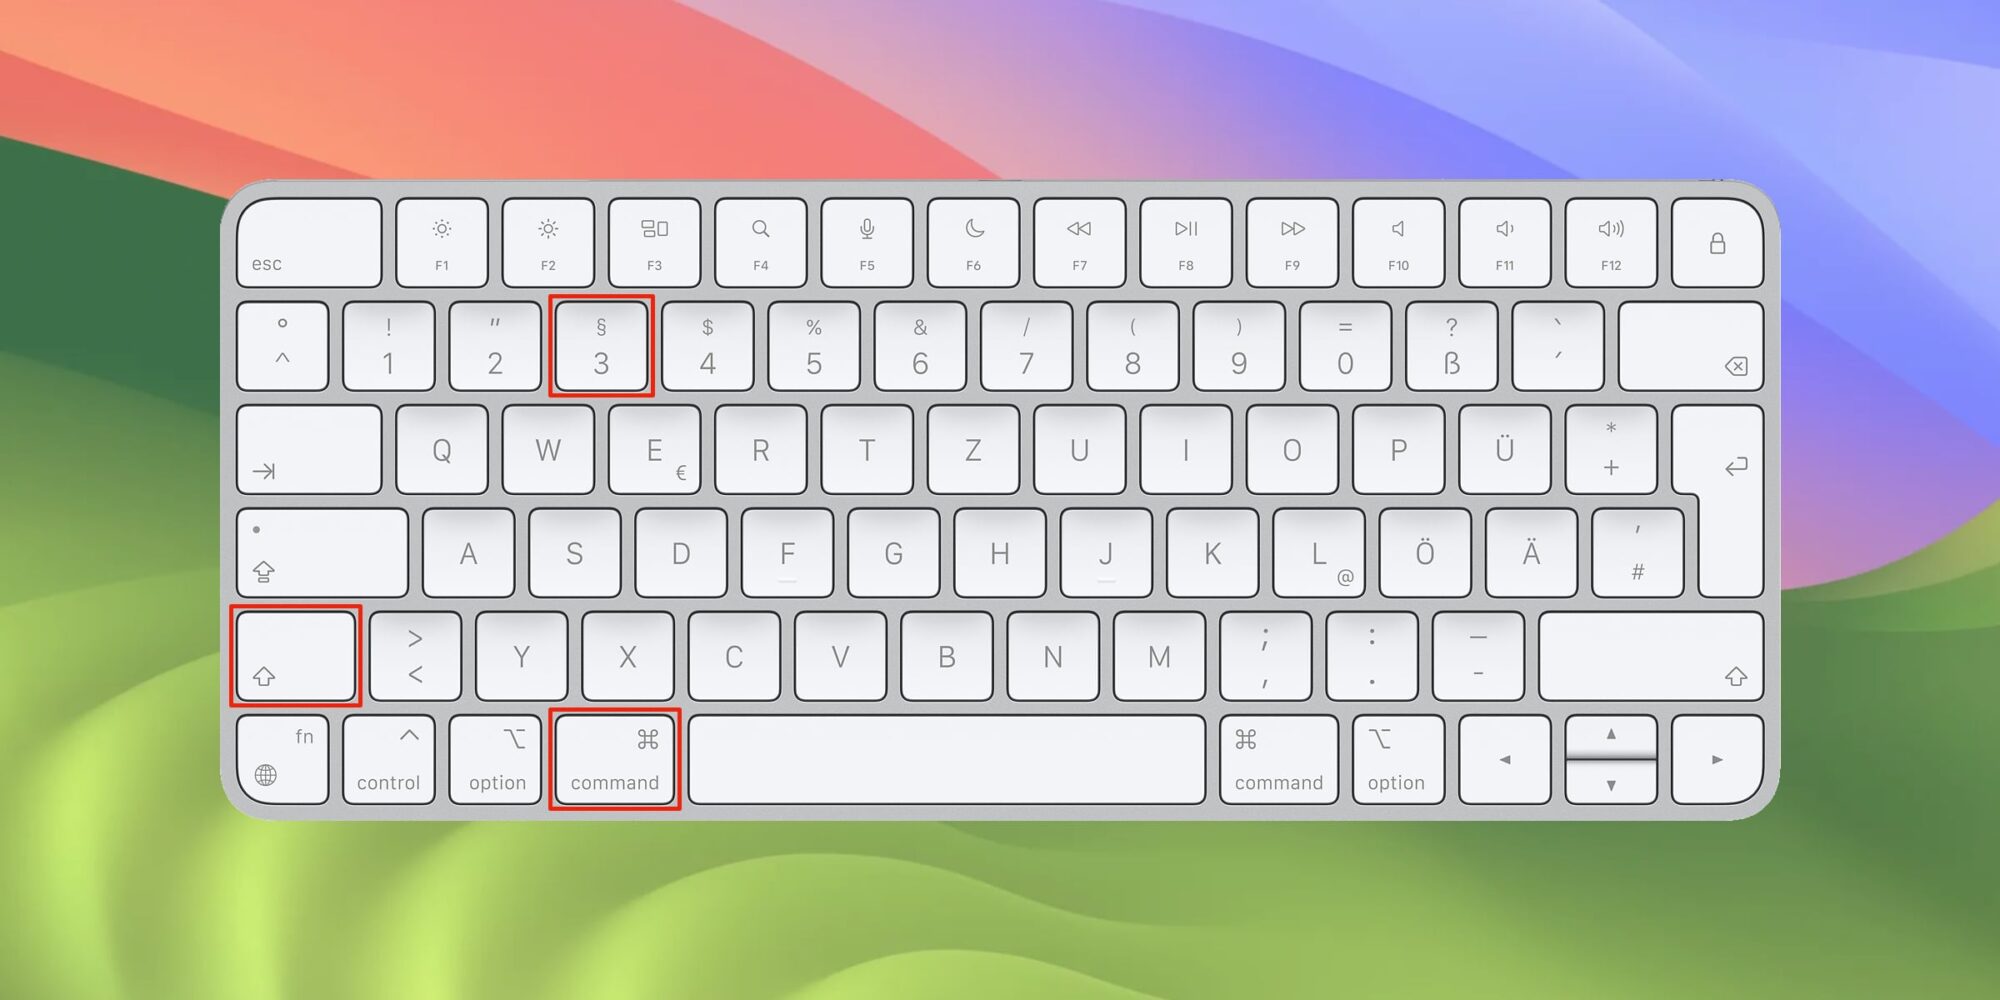
One of the easiest ways to take a screenshot of multiple windows on your Mac is by using the built-in Screenshot tool. Here's how: * Press `Command + Shift + 5` on your keyboard to bring up the Screenshot toolbar. * Click on `Capture Selected Windows` option. * The Screenshot tool will highlight the multiple windows you want to capture. * Click `Capture` to take the screenshot.Method 2: Using the Screenshot App
If you want more control over your screenshots, you can use the Screenshot app, which is built into your Mac. Here's how: * Open the Screenshot app from your Applications folder or Spotlight search. * Select the `Capture Selected Windows` option. * Choose the windows you want to capture by clicking on them. * Click `Capture` to take the screenshot.Method 3: Using the ScreenFloat Tool


")


: Complete Methods & Tips")


![12 Ways to Take Mac Scrolling Screenshots [with macOS Tahoe] - AnyRec](https://images.wondershare.com/videoconverter/article/2024/best-screenshot-tool-mac-15.jpg "12 Ways to Take Mac Scrolling Screenshots [with macOS Tahoe] - AnyRec")

